One of the most popular models for releasing software is the introduction of small iterative changes while safely building towards a more complete product. One of the benefits of this approach is ensuring a tight feedback loop while releasing new features. If the feature isn’t performing as expected, you can quickly course-correct to prevent making costly investments on a feature that won’t provide a meaningful return. A common tool that you may use to help control new feature releases and to monitor the success of that feature is called a feature flag.
With a quick Google search, you’ll find many service options that can help you implement feature flags (GrowthBook, Optimizely, etc). These services can give developers a means to get actionable data into the hands of a product team. That data is used to safely roll out new features, refine ideas quickly, and have confidence in knowing when you’ve done something that works well.
At Pinwheel, we use an experimentation framework called Statsig, which will be used for the examples below. If you’d like to follow along, your first five million Statsig events are free which provides plenty of room to explore the core features and make a determination about whether it makes sense for your team. By the end of this article, you’ll understand a few core concepts of an experiment framework and how to set up your first feature gate.
We ❤️ Python at Pinwheel, so the code snippets below will leverage the Python SDK that Statsig offers, but they currently support client and server SDKs for thirteen languages.
The power of an experiment framework comes from its flexibility. The concept of an “experiment” is very loose, so we’re constantly innovating new ways to derive value from Statsig across all of our engineering teams. Common examples include:
- A/B test a UX change to one of our public facing products
- Gate access to a feature for a subset of customers
- Controlled rollout for a change to one of our internal services
Before we write any code, we need to cover a couple of important fundamentals and handle some basic configuration inside Statsig’s Feature Gates menu.
Statsig’s product offering for implementing feature flags is called a Feature Gate.
Feature Gates
Feature Gates are one of Statsig’s most fundamental tools that can be used to control which users get exposed to a specific feature, product, service, etc. Feature Gates simply return a boolean value. In the typical feature gate example, you send contextual information at a point in your product flow and the experimentation framework will run that information against rules that you configure to determine which boolean value should be returned back to you.
To setup your first feature gate, go to the “Feature Gates” menu which should be located in the left side panel from your account dashboard and click “+ Create” to see this form:
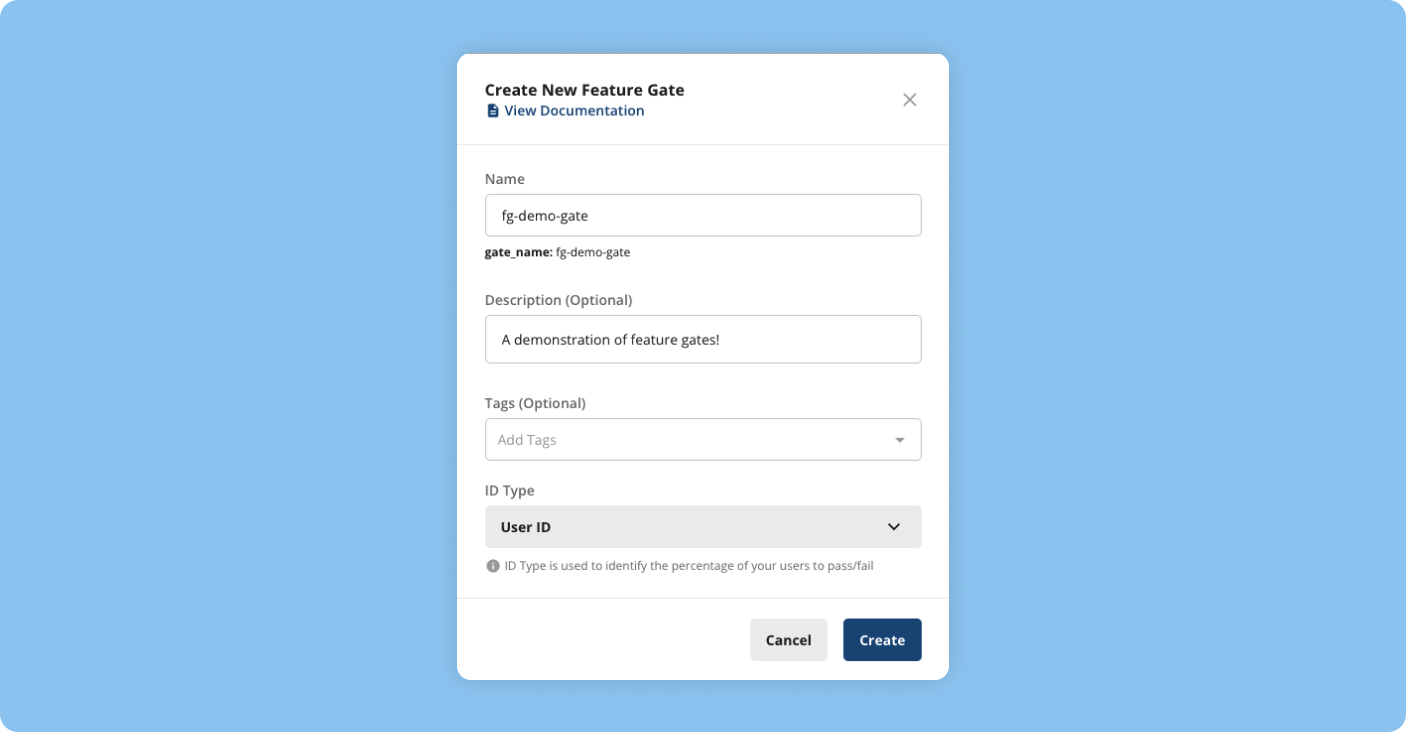
- Name is what you want the feature gate to be called. It’s a good idea to find a common naming convention for your team.
- Tags give you a way to group a collection of feature gates together for easier filtering. We will leave it blank for now.
- ID Type is the type of ID you’d like Statsig to use as a way of identifying a unique user in your product flow. We’ll use the default User ID type for now.
After clicking “Create”, you’ll find yourself on the fg-demo-gate feature gate’s dashboard. From here, you can edit settings, view diagnostics/results, and configure rules for the feature gate.
Rules
Rules are the basic building blocks for a feature gate. Rules are essentially boolean expression chains that give you granular control over the traffic you’d like to have pass or fail your feature gate.
You’ll notice an “All Rules” section that currently only has a default “ELSE” rule which is set to “always return false”. In other words, without any rules configured, all checks of this feature gate will fail. To fix that, click the “Add New Rule” button above the default rule. You’ll see a menu that looks something like this:
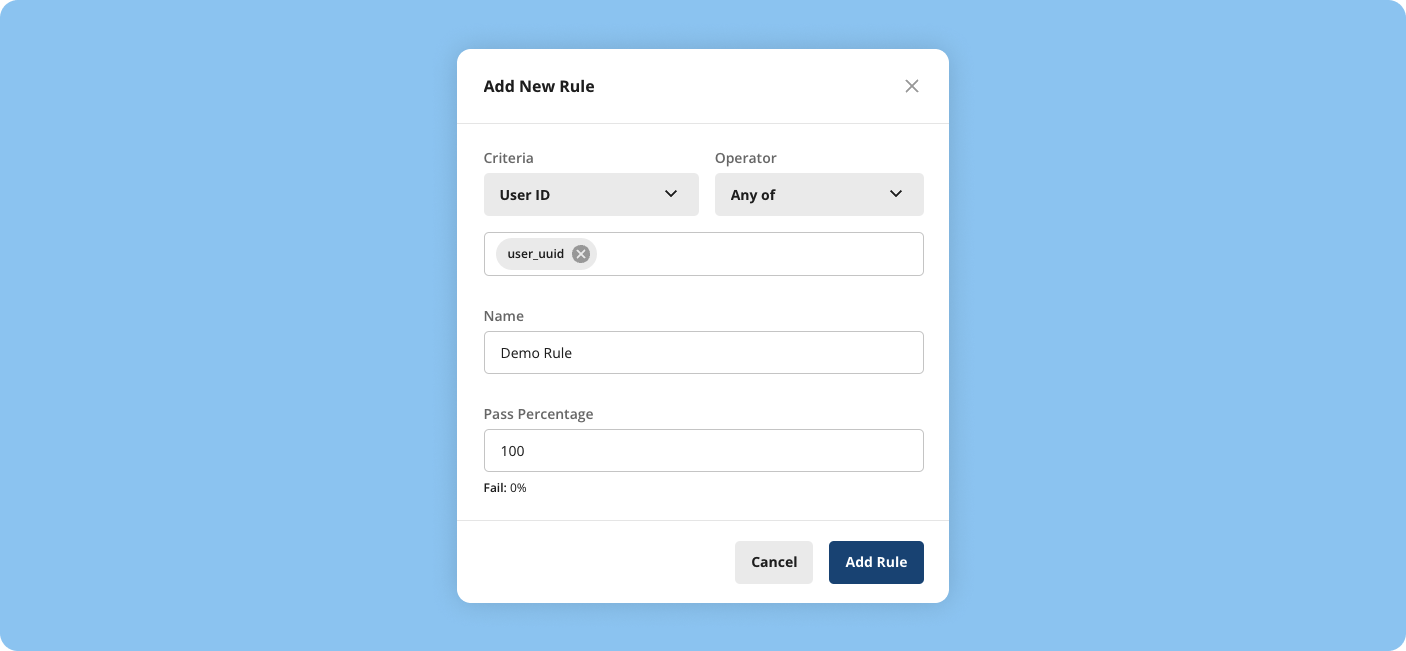
- Criteria is the targeting criteria you’d like to use for this rule. We’ll leave it set to the default value of User ID.
- Operator gives you options for matching the Criteria like Any of, None of, and Is null. We’ll use Any of to allow us to match this rule against any user-uuid that is sent through this gate.
- Name is the name of the rule for identification against other rules.
- Pass Percentage is exactly what it sounds like. We’ll set it to 100% pass for this demo.
After you click “Add Rule”, you’ll see it appear in the list of rules you have configured for this feature gate. Once you’ve initialized the Statsig client in your application, it will poll for rule updates every ten seconds by default, so you can expect any changes to take effect almost immediately. Rules will be evaluated from top-to-bottom and are mutually exclusive, so you’ll want to make sure to keep ordering in mind as you organize them. With our feature gate and first rule configured, we are ready to write some code!
Setting up the Statsig SDK
You can get up and running quickly by installing the SDK with the package manager of your preferred language and writing a few lines of boilerplate code. From your terminal:

After the package has been installed, you can initialize the SDK from inside your text editor:

The sdk-api-key is something you’ll find in your “Project Settings” under “API Keys”. At this point, the Statsig client will fetch updates from Statsig in the background. You’re ready to use this client to check your new feature gate, but we have one more important Statsig concept to cover first!
StatsigUser
When working with an experiment framework like Statsig, it’s important to have consistent results for a user across all of your products and services. In other words, you’d like a user to always either pass or fail a feature gate each time it’s checked. This makes the out-of-the-box analytics even more powerful because it can now tie that user to multiple points throughout your product flow, giving you a richer visualization of their experience and ensuring that you’re presenting the user with congruent options.
To manage tracking users, Statsig has the concept of a StatsigUser. The StatsigUser schema looks like this for the Python SDK:
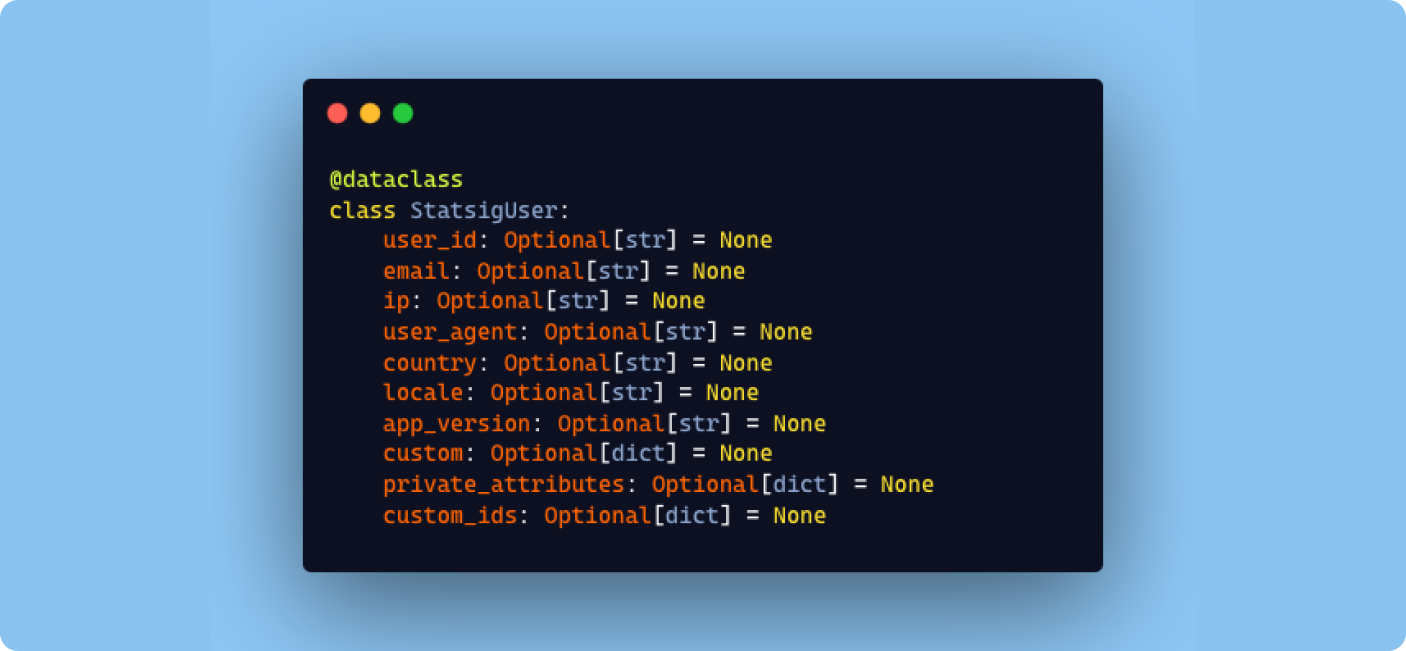
As you can see, there is flexibility in how you determine what makes a user unique for your feature gates, but you’ll typically only provide one or two values. With that out of the way, let’s finally test the feature gate!
Testing the Feature Gate
To check a StatsigUser against the fg-demo-gate feature gate, you may do something like this inside your application code:
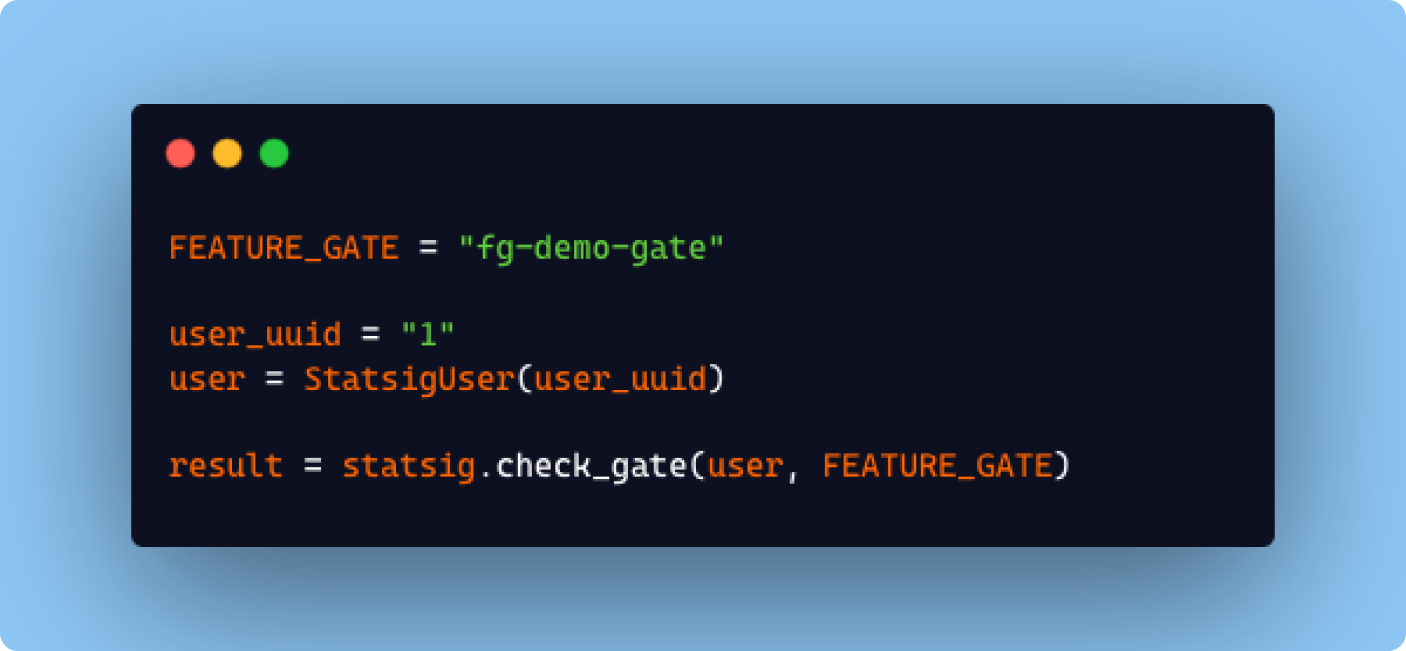
And for every follow-up gate check for the StatsigUser with an id of 1, as long as the target criteria matches one of the defined rules in this feature gate, you’ll get consistent results from the Statsig SDK. Following the gate check, you may choose to execute some code differently based on the result:
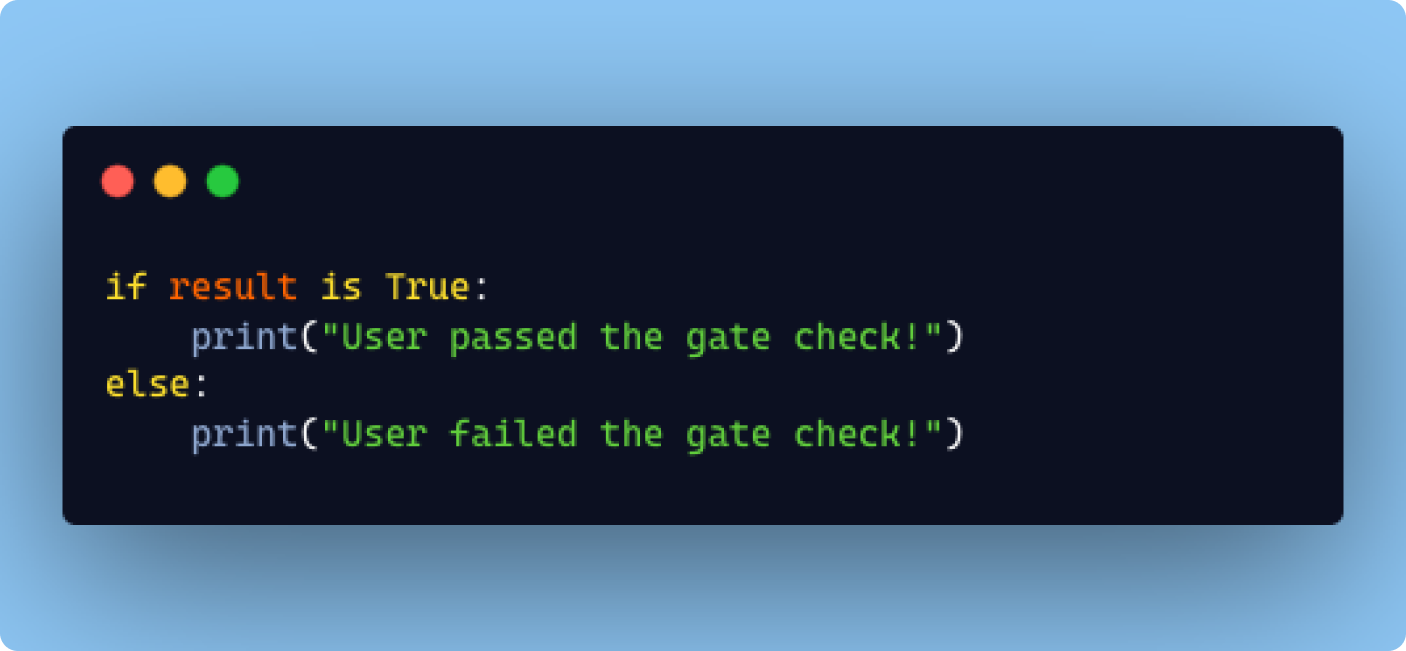
And that’s all there is to it! You’ve now successfully setup and run a check against your first feature flag! We’ve only touched on the most basic concepts of an experiment framework like Statsig with a feature gate example, but most of these services offer even more powerful tools to conduct and monitor experiments across your organization. Some examples from Statsig include Events, Segments, Dynamic Configs, and Experiments.
In the time that we have been using an experiment framework at Pinwheel, we’ve found it to be an invaluable asset in helping us in our mission to become the leader in payroll data connectivity. If your team is looking for ways to expand your capabilities to run robust product experiments, maybe give one a try!
Check out our related content down below to see other tech spotlights!


.svg)
.svg)


